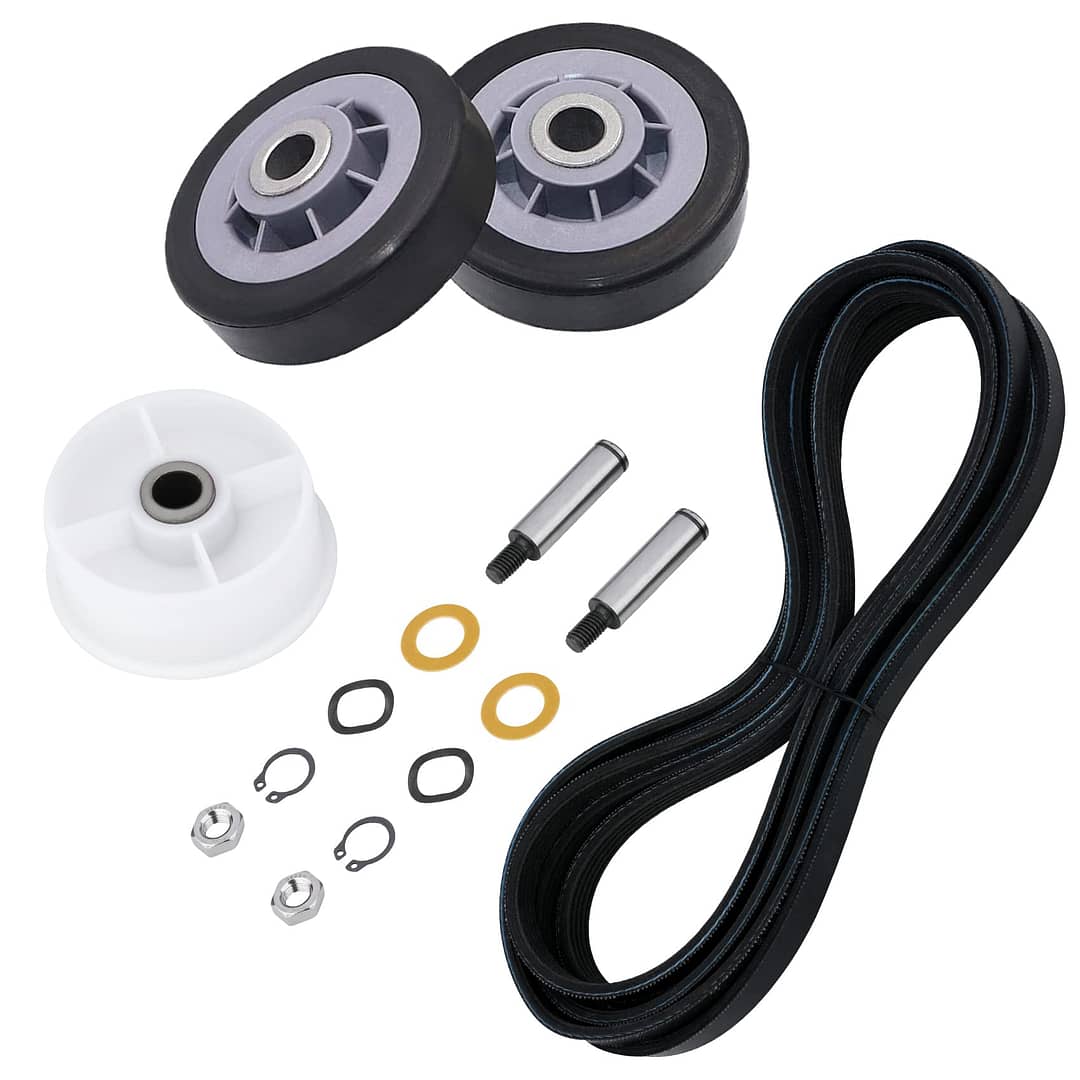
Maytag Centennial Dryer Belt Replacement: Fix Your Dryer in Minutes!
To replace the belt for your Maytag Centennial Dryer, first, unplug the appliance and turn off the gas supply (if applicable). Then, remove the front panel and drum to access the old belt.
Carefully release the tension from the idler pulley and remove the belt. Install the new belt around the drum and reattach the idler pulley, ensuring proper tension. Finally, reassemble the dryer’s front panel and plug it back in. Replacing the belt in your Maytag Centennial Dryer is a straightforward process that can be done at home with a few simple steps.
By following these instructions, you’ll have your dryer working like new in no time. This guide provides a step-by-step approach to replacing the belt, from preparing the dryer for maintenance to reassembling it after the belt replacement. With just a few tools and some patience, you can easily replace the belt on your Maytag Centennial Dryer and save on the cost of a service technician. Don’t let a broken belt slow down your laundry routine – follow these instructions and get your dryer back in action quickly.
Signs Your Maytag Centennial Dryer Belt Needs Replacing
Is your Maytag Centennial dryer not spinning? Do you hear unusual squeaking or grinding noises? Are your clothes taking longer to dry? These are all signs that your dryer belt may need to be replaced. When the belt becomes worn or damaged, it can affect the performance of your dryer.
If your dryer drum is not spinning, it is likely due to a broken belt. The squeaking or grinding noises could be caused by a belt that is frayed or slipping. If your clothes are taking longer to dry than usual, it may be because the belt is not properly rotating the drum.
Replacing the dryer belt is a simple and affordable fix that will ensure your Maytag Centennial dryer is working at its best.
Tools And Materials You’Ll Need
To replace the Maytag Centennial dryer belt, you will need a screwdriver and pliers. Make sure to wear work gloves and safety goggles for protection. These tools and materials are necessary for a successful belt replacement. Follow the instructions carefully to avoid any accidents or damage to the dryer.
Start by unplugging the dryer and removing the front panel. Locate and release the tension on the belt by removing the idler pulley. Then, remove the old belt and replace it with a new Maytag Centennial dryer belt. Finally, reassemble the dryer by securing the front panel and plugging it back in.
This simple DIY task will have your Maytag Centennial dryer up and running smoothly in no time.
Step-By-Step Guide To Maytag Centennial Dryer Belt Replacement
To replace the Maytag Centennial dryer belt, start by disconnecting the dryer and shutting off the gas supply if applicable. Next, remove the top and front panel of the dryer. Release the tension of the old belt and carefully remove it.
Now, install the new Maytag Centennial dryer belt, making sure it is properly aligned. Reassemble the dryer by putting the front panel and top back in place. Finally, test the dryer to ensure it is functioning correctly. Enjoy your fresh and efficient drying experience with the new belt.
Bonus Tips For A Successful Maytag Centennial Dryer Belt Replacement
A successful Maytag Centennial dryer belt replacement can be achieved by following these bonus tips. Ensure optimal performance by cleaning the dryer vent and lint trap regularly. Also, don’t forget to check for any other worn or damaged parts that may need replacing.
Regular maintenance and timely repairs will prolong the life of your dryer and keep it running smoothly. By taking these preventive measures, you can avoid costly repairs and maintain efficient drying cycles. So, make it a priority to clean the vent and lint trap, and inspect your dryer for any signs of wear and tear.
Remember, a well-maintained Maytag Centennial dryer will save you time, money, and the hassle of unexpected breakdowns. Happy drying!
Safety Precautions To Follow During Maytag Centennial Dryer Belt Replacement
To ensure safety during the Maytag Centennial dryer belt replacement, it is important to take precautions. Always wear work gloves and safety goggles for protection. Before starting, make sure the dryer is disconnected from any power sources to avoid accidents.
When handling the dryer, be cautious of sharp edges and moving parts. By following these safety guidelines, you can carry out the belt replacement process safely and efficiently.
Frequently Asked Questions (Faqs)
Maytag Centennial dryer belt replacement is a common concern among appliance owners. You may wonder how to replace the belt on your dryer and what steps to follow. Here are some frequently asked questions regarding this issue. Q: How can I tell if my Maytag Centennial dryer belt needs replacement?
A: Look for signs of wear and tear, such as fraying or cracking, and listen for unusual noises during operation. Q: What tools do I need to replace the belt? A: Generally, you will need a Phillips screwdriver, a putty knife, a nut driver, and a new belt.
Q: Can I replace the belt myself, or should I hire a professional? A: While it is possible to replace the belt yourself, hiring a professional can ensure proper installation and prevent any further damage to your dryer. Q: Where can I find a replacement belt for my Maytag Centennial dryer?
A: You can purchase a replacement belt from authorized Maytag dealers or online retailers. Q: Are there any specific instructions to follow during the replacement process? A: It’s important to consult your dryer’s user manual for detailed instructions or watch video tutorials for a step-by-step guide.
By referencing the FAQs above, you can address concerns about Maytag Centennial dryer belt replacement and provide helpful information to your readers.

Credit: fixappliances.ca
Frequently Asked Questions Of Maytag Centennial Dryer Belt Replacement
How Do I Know What Size Dryer Belt I Need?
To determine the size of your dryer belt, first locate the model number of your dryer. Use this number to search online for the correct belt size.
How Do I Know If My Dryer Belt Needs To Be Replaced?
Signs your dryer belt needs replacement: excessive noise during operation, clothes taking longer to dry, visible fraying or wear on the belt, or the drum not spinning.
Are All Dryer Drum Belts The Same?
No, not all dryer drum belts are the same. Different dryers require specific belts for proper functioning.
What Causes A Maytag Dryer Not To Spin?
The Maytag dryer may not spin due to a worn-out drive belt or a faulty motor.
Conclusion
To sum it up, replacing the belt of your Maytag Centennial Dryer is a task that can be easily accomplished with a few simple steps. This not only saves you money by avoiding a costly service call or repair, but it also ensures that your dryer continues to work efficiently and effectively.
By following the manufacturer’s instructions and taking the necessary safety precautions, you can successfully replace the dryer belt in no time. Remember to have the right tools on hand, such as a screwdriver and a new replacement belt, and take your time to carefully disassemble and reassemble the dryer.
With a newfound confidence in your DIY skills, you can save time and money by tackling this belt replacement project yourself. So why wait? Get started today and enjoy the hassle-free experience of a smoothly running Maytag Centennial Dryer.
Hi, my name is Gabrielle. I have been into Automotive Industry for over 15 years. If you’re anything like me, then building, maintaining and improving your Automotive Industry/Projects is all part of the Automotive experience.
My goal with this blog is to share my experience with and help you discover new and exciting things about Automotive.

